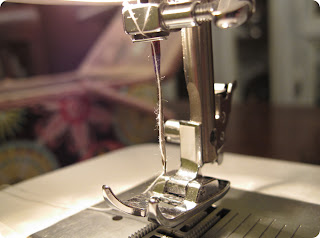
And on to the first installment of my tutorial series: Learn to Sew! The following tutorial isn't necessary for everyone- {if you already know how to work your machine}- but for those who maybe have a machine and have never used it, or who are thinking of getting one, I'm hoping this could be a useful resource for them.
When I first got my machine I had to figure out how to use it on my own... and got quite frustrated trying to read the manual. So here's a {hopefully helpful} guide on your machine and how to thread it and the bobbin.
PS... My machine is a very basic model
Step 1: Threading the Bobbin
Put your desired color of thread on the machine.
Follow the instructions on your machine- mine has the dotted line to tell me how to thread my bobbin.
I loop it around that little screw just like the picture.
Thread the bobbin {Make sure to get the correct bobbins for your machine- I've had lots of headache using the wrong bobbins on accident.}
For my machine, in order to wind the bobbin I need to push it over to disengage the needle from going up and down when I step on the foot pedal. {When you're done winding, make sure to push back}.
Wind the bobbin to desired amount by stepping on the foot pedal.
Bobbin wound! {I didn't wind it all the way because I was short on thread...}
Place bobbin into bobbin case and pull the string to ensure the bobbin rotates clockwise.
Place bobbin case in machine after it's threaded.
Bobbin threaded! Now thread the top of the machine in order to pull the thread through...
Step 2: Threading the Machine
{Before threading make sure the sewing foot is UP}
I find cutting the end of the thread is the best way to thread the needle {keep in mind I don't have an automatic threader on my machine}
Now to pull the bottom thread through...
Manually wind the needle down using the side of the machine
And back up while gently pulling on the top thread.
A loop should come up with the thread- pull one side of the loop to find the end of the thread.
Place both threads under the sewing foot.
A fully threaded machine! {Make sure the thread length is sufficient enough that the machine won't unthread while sewing- I usually have it extend a few inches past my machine.}
If the machine is threaded correctly the top thread should pull easily.
A good rule is to keep this dial right at around 4 for most sewing jobs
This dial will tell you the distance between your stitching {1 and 0 being a very tight stitch and 4 being widest}
Choose a stitching type and you are ready to go!
I hope this was helpful to you! If you are having troubles with your bottom thread getting messed up when you sew try threading the top of the machine again and checking that your bobbin is threaded correctly.


I am opening my new sewing machine (given to me for my birthday 3 months ago and shoved in the corner!) for the first time tonight! Thanks for helping calm my fears of failure!
ReplyDelete